Posted on 1 Comment

Rustic repurposed cheese box storage container

After downsizing last year from a 5 bedroom, 4 1/2 bath home, into a 3 bedroom, 2 1/2 bath, 1920’s renovated mill house in Monroe, Georgia, we found ourselves with 20 years’ worth of stuff that we had no idea what to do with. Most of it is in storage units. Yes plural. Units. Three of them. And trying to figure out what is essential and what isn’t, was and still is, a huge challenge. I’ve had to put my organizational skills to the test and decorative storage containers have saved my sanity on more than one occasion. Cute little boxes and bins are great for hiding odds and ends that otherwise would make my little home look cluttered.

I have a tiny powder room in my hallway that has very little storage space. The sink vanity is narrow and holds hand towels and not much more.

I needed somewhere to store my toilet paper and I did not want the spare toilet paper rolls visible. While shopping at my little neighborhood grocery store, I found a stack of these wooden cheese boxes in the back by the meat department.

Low and behold they sell them for $1 and I snatched them up before the rest of the town could find out about them. This cheese box is the perfect size to hold the extra rolls of toilet paper in my little powder room. It just needs to look a little more rustic and I am going to show you how I created mine.

This project is quick and easy and can be modified to fit any decor. You can use any paint color or stain and use this stencil, a different stencil or no stencil at all. I wanted a dark stained piece, and I chose this stencil because I wanted to be able to use it in any area of the house if I decided I didn’t like it in the bathroom.

I chose a Red Mahogany wood stain for the box and a Dark Granite acrylic craft paint for the stencil.

I made the stencil with my Silhouette machine, but you can buy stencils or even hand paint the top if you wish. I lined my stencil up on the top of the box and went to work with my acrylic paint.

Once I removed the stencil, I had a little bit of hand painting to do because of the way my stencil was cut.

And now I can brag about it truly being a hand painted piece.

While I waited for the top to dry, I took my chip brush and stained the inside and outside of the bottom of the box.

These boxes soak up a lot of stain. It took almost the whole 8oz can and then took forever to dry. Once the stencil was dry, I stained the inside and outside of the top of the box.

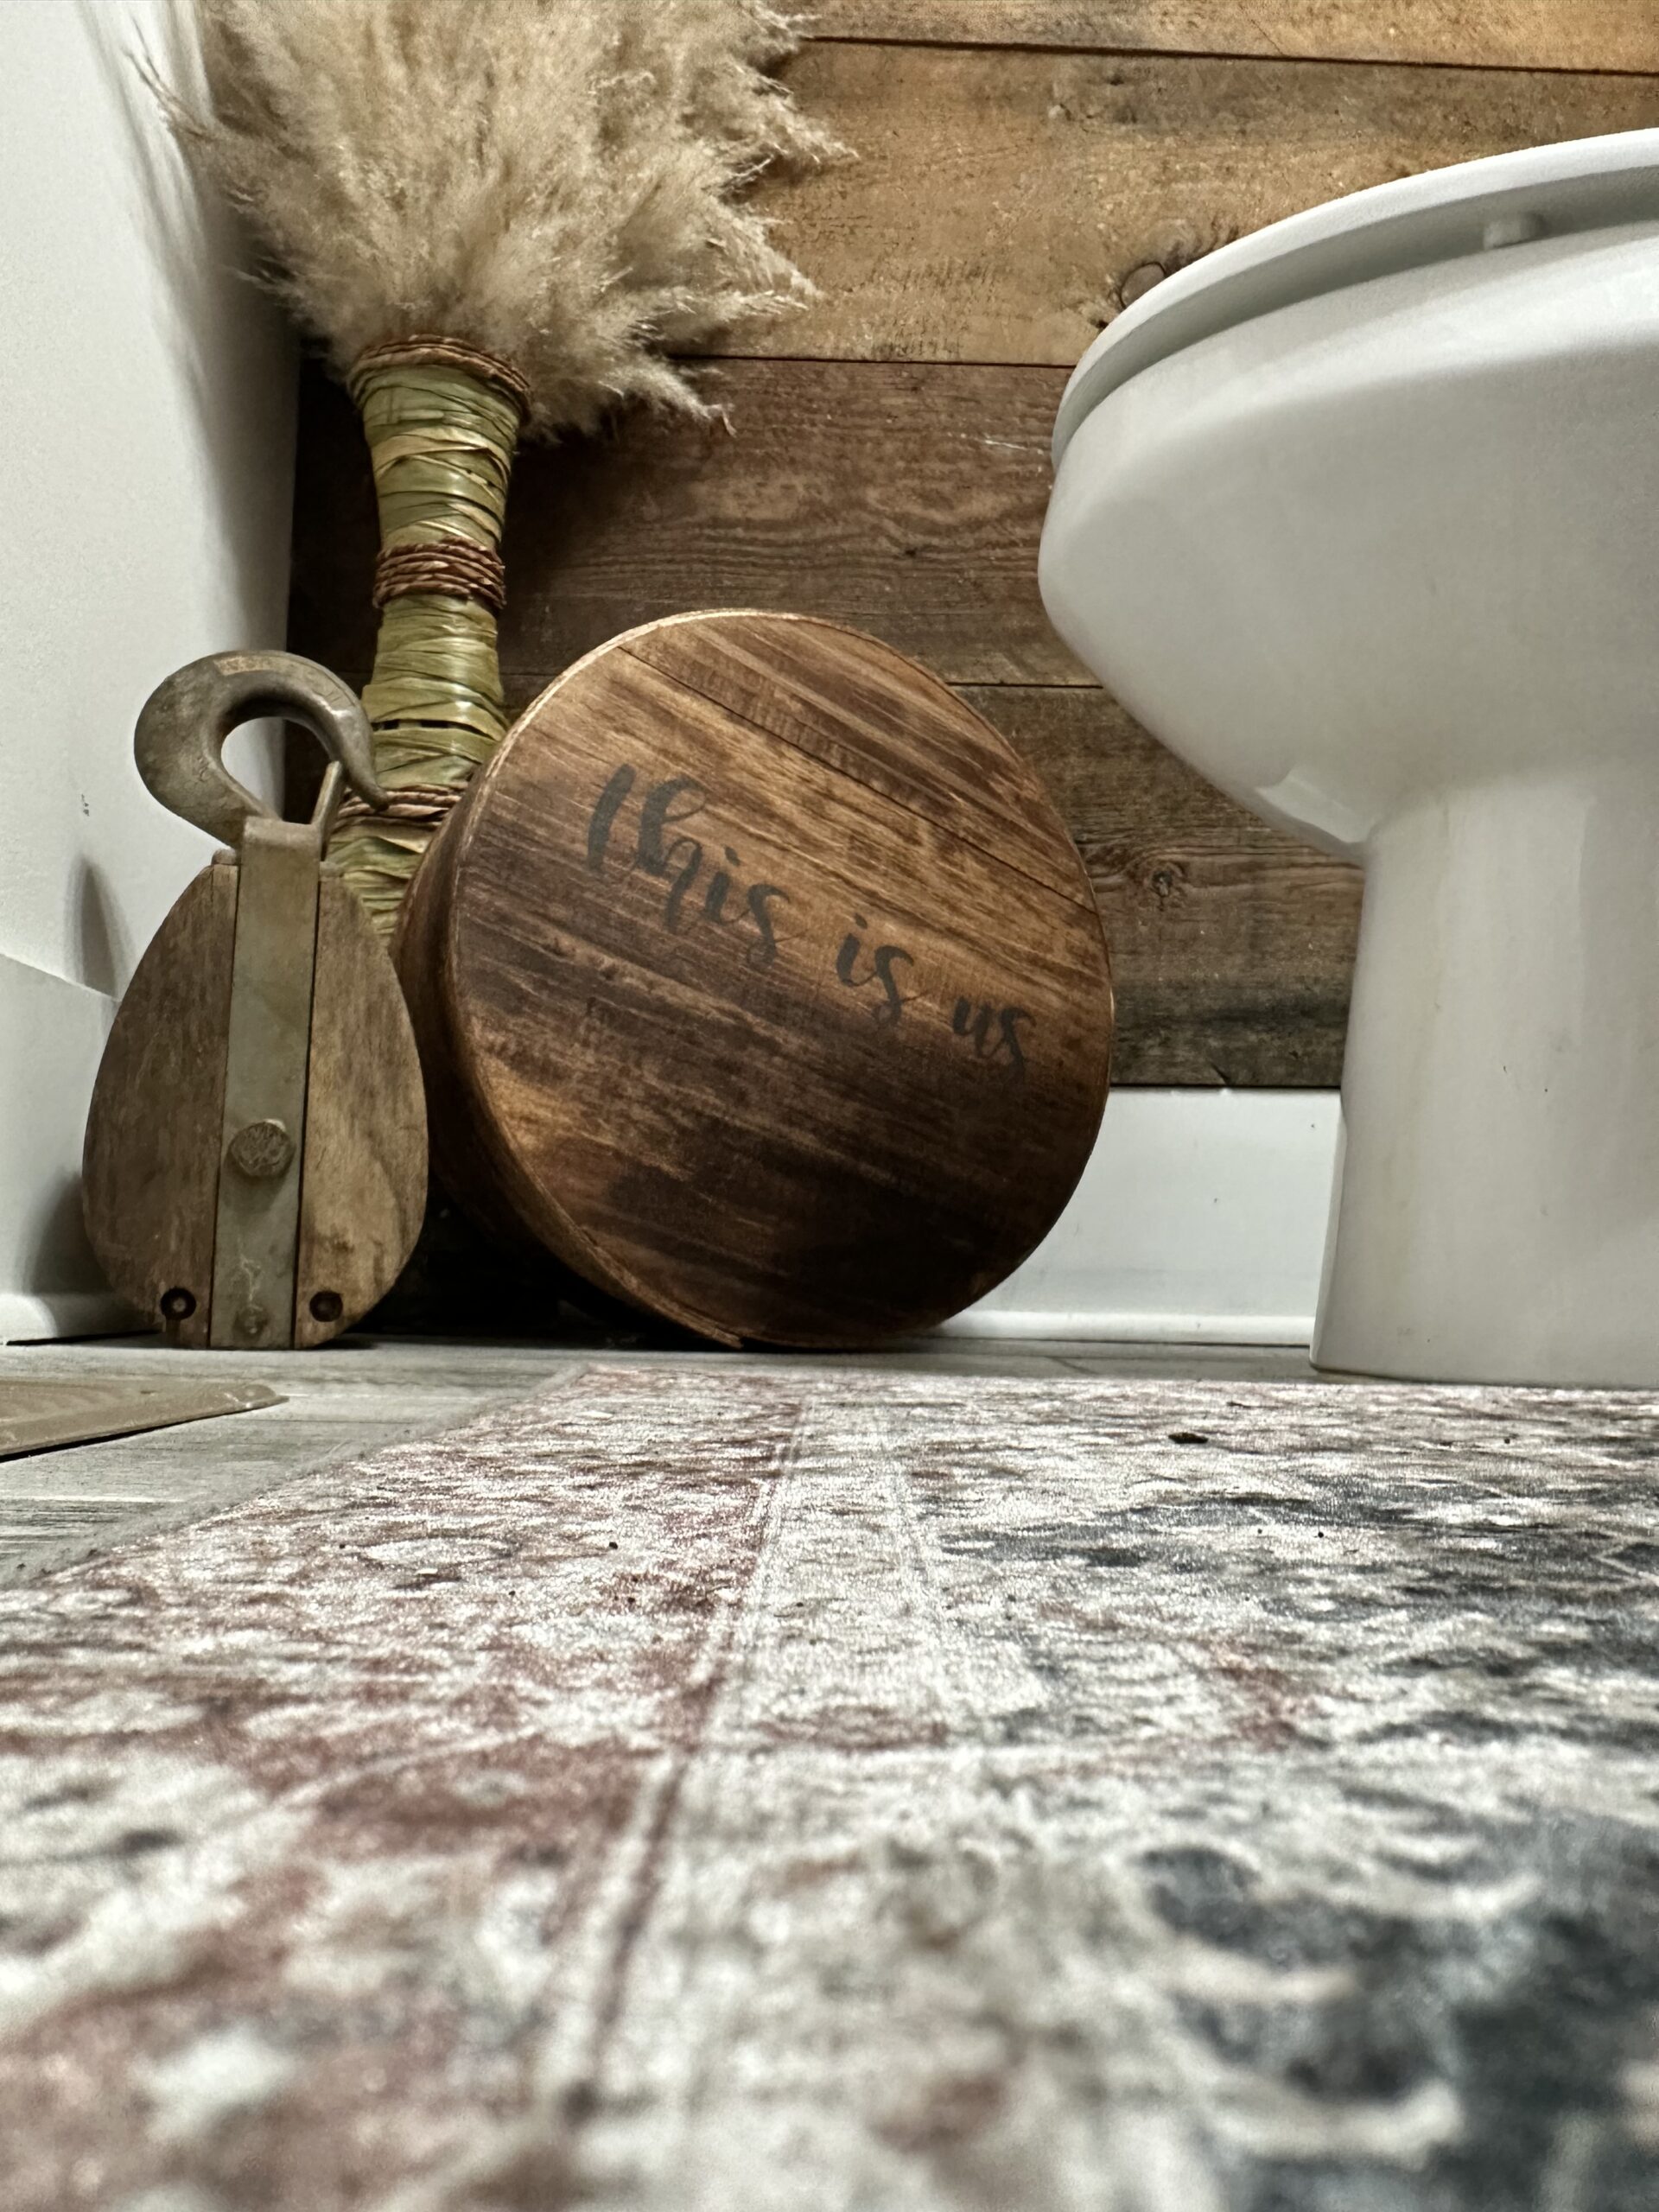
The stain is darker than I thought and next time I would either go lighter on the stain or use a black acrylic paint on the stencil. Here is my finished piece and its new home. For now.

Follow me for more inspirational ideas on creative, upcycled storage and organization.

Posted on

Chippy antique triple mirror vanity on wheels

This little beauty was already chippy when I brought her home. Her short spindle legs had holes for the wood caster wheels but all of them were missing. I have the uncanny ability to set out on a mission and find certain items and this was the case with these casters. I stopped at an estate sale one day and found an entire box of casters. They were old and all different sizes, but I just knew they would work! Sure enough, after giving them all a little tap, they fit perfectly and she now glides with grace.

Her already distressed state was enhanced with a little more sanding and sealed with a coat of wax to keep her chippiness intact.

The gorgeous triple mirror is my favorite part. The wood frame is cut to match the curve of the mirror and is separate so that it can be removed. The mirror is original and has some wear and aging however there is no broken or chipped glass.

There are two dovetail drawers and both move freely with no sticking. The original metal drop ring drawer pulls have been left to keep it true to its antique era.

She stands 29” tall to the table top, 40” long and 17” deep. The mirror is 36” tall for an overall height of 65”. The chair or stool opening is 16” wide. Her off white color ensures cohesiveness in any decor and in any room. She would be perfect in a little girls bedroom, but would also make a great entryway piece or use as a desk for additional work space. Please visit Knicknaques Vintage Boutique at 707 S. Broad St, Monroe, GA 30655 or go to my facebook page for more information. Don’t forget to like and share my page. 😊 Thanks for looking!

Posted on

Happy New Year!

Welcome 2019! It’s 11:35 on January 1, 2019 and my urge to start and finish this blog on this day may or may not come from a new year resolution. So here I am. Starting a new year, reflecting over the day and putting my experiences into words.

We spent New Years Eve at our friends, Daryl and Adina’s house for dinner and a friendly game of poker. Daryl is a fantastic BBQer and never fails to put on a feast for a king’s army. We were treated to piles of BBQ chicken, ribs, macaroni and cheese, baked potatoes and biscuits. His wife, Adina, is from Romania and decided to spend New Years Eve with her Romanian friends in Atlanta for a big ethnic event. She looked beautiful in a ball gown and graced us with her presence before leaving us for the night. The rest of the evening was spent eating and playing poker before a champagne toast at the stroke of 12. It was a phenomenal way to close out 2018.

I spent New Year’s Day putting up some of the leftover Christmas decor. I kept the tree and decorations up a few days longer in the basement to celebrate with my sister, since we couldn’t get together before the holidays. I found some time, once the basement was clear, to finish painting a French Provincial side table that I started last week. It was my first attempt at gold leaf and I am thrilled with the way it turned out.

I consider myself to be pretty superstitious and have adopted the traditional southern New Year’s Day meal. Over the past 23 years of living in the south, I have perfected my menu of honey glaze ham, black eyed peas, collard greens and cornbread. My kids, who normally hate greens, have come to love this meal and rave about my cooking. Black eyed peas are eaten for luck, collard greens are for money and they eat it all. I’m already feeling like the luckiest person alive. Our best friends Lanie and Jason joined us with their 18 month old daughter Jamie and we spent the evening watching Jamie and my 6 month old grand baby, Iris, playing on the living room floor.

I couldn’t ask for a better start to 2019 and I am ready to put some action into finishing a few goals for this year. I WILL start tomorrow with eating better and sticking to my Weight Watcher goals. BRING IT ON!

I’m a bit late with this post, but at least I can say I finished. Good night!

Jayme

Posted on

Out with the old and in with the new

2016 was an exciting year! With the opening of my store, Knicknaques, and the crazy schedule of appraisals, there wasn’t much time to get to all of the projects I have on my list.  So, in 2017, I am vowing to get more custom jobs finished. 


Over the past few months, I have collected an assortment of beauties that I am calling my “Emerald” collection. Somehow I ended up with a stash of green pieces and although they’re lovely in their current condition, I always envision something better. 


I have had this green wing chair sitting in my garage for awhile and we actually use it there. Its also on my list to redo and I’m not sure what we will do without it in the garage. Yes, I do…I will find another chair to fill its place. Duh. Until then, I am going to chalk paint over the green and recover the seat. I’m thinking gray with a stenciled canvas seat…


I found this little cutie at a thrift store. I walked by it several times before decided that it would be adorable sanded down and stained and the top recovered in burlap. Here’s hoping that green paint wants to come off easily. 😬

I love, love, love this sewing chair. 💚 The green vinyl is in excellent condition, although the color is a little outdated. There are so many possibilities with this one! But then again, I may just leave it be. Hmmmm…


This ottoman is a popular size and can be used in any room. As a bench, an ottoman, a footstool or an accent piece. I have already recovered a similar one in a coffee bean sack and it turned out beautiful. I think I want to do something different with this one, I just haven’t decided what yet. 

Come back to see how they all turned out! Feel free to leave me a comment with your suggestion. I love fresh ideas!
Jayme

Posted on

Vintage pinch pleat curtains

Four simple words that bring me so much joy. I have two pair in my booth right now and they’re just hung on nails in the wall. 


No rods or hooks-just flat on the wall. My booth is mostly mid-century goods and the panels give just the right touch of retro flair. I’ve been dabbling in different ideas for curtain rods and hope to get my curtains hanging appropriately soon. 

In the meantime, I have been redecorating my living room. I’m tired of my jungle theme. Tired of the giraffe pictures and elephant statues. 

It’s been that way for more than 10 years and time for a change. All the furniture had to come out to refinish the hardwood floors and it was a perfect opportunity to start with a clean slate. My dingy sand colored walls are slowly transforming to a lovely shade of light grey-blue and my mantle now showcases recent vintage finds.  

I’ll have to stick with my brown micro suede sofas and oversized chair and ottoman but they go with the flow, for now. 

I have always done my decorating by picking a focal point and creating from there. So to be honest, the entire inspiration of my redecorated living room comes from a beautiful pair of pinch pleat curtains I found at an estate sale. They were buried in the back of an old barn under piles of old rugs and bedspreads. They were wrinkled, musty smelling and  look more like old sheets than a pair of curtains, but they were perfect to me! I took them home, washed them and hung them on my windows, on my freshly painted wall. It was destiny. Or fate. Or whatever….they were meant for my living room!

 I didn’t want to use the traverse rods with the tracks made for pinch pleats, so I found a way to hang them using the rings with clips. I took the clips off so that the little loop was at the bottom of the ring. Then I used the drapery pins in the pleats and hooked the pin through the loop. Since I have blinds on the window, I won’t be pulling the curtains back and forth, but I can if necessary. Tahdah! 

Now to finish painting my walls and find an old dresser to use as a console for our majestic 65″ TV. I will show you the finished project just as soon as I get it complete. Thanks for following me!